Showing posts with label nail art. Show all posts
As Summer has begun and therefore so has my abundance of spare time, I sorted out my nail polishes.  Before I start - nail polish vs. nail varnish...is there a difference? What do you say?


I now keep all of mine in this amazing woven cath kidston-esque bag one of my bezzies Charlotte gave me my birthday presents in which kind of inspired this nail art.  (Along with Sophie buying me nail polish and saying "look it's like Cath Kidston colours so you can do nail art")


  • First is the basecoat, I used 'Sweet as Sugar' by Rimmel as it is thick, smooth and not overpowering.


  • Next I used Model's Own 'Strawberry Tart' to create three (you can do more, you can do less) dots on my nail.  I used the brush rather than a pen. 


  • Now, using another Rimmel polish, this time 'Hot & Spicy' I, for want of a better word, sploged a darker colour around the pink.  Sort of like the outer petals.  I did this by putting some of the polish on a sheet of paper, then using a cuticle stick to paint it on.  


  • I then did the same but as leaves with Barry M's 'Greenberry'.


Voila! I used 'Hot & Spicy' on my other three nails with 'Sweet as Sugar' as pinstripes and polka dots, all done with a cuticle stick.  I did go on to smudge one getting my panini out of the grill though ~sad face~

So a super easy nail tutorial - done!  Let me know how yours go.

My first day despite both initial apprehension and nearly getting lost trying to find Cardiff Gate Business park went swimmingly! Everyone at Freshwater was welcoming, chatty and helpful.  I spent most of the morning finding retailers to put on a client list and reading through trend sheets/briefs for new projects.  On-wards to day two!


Unline yesterday where near enough my whole outfit was Urban Outifitters, I have opted for a Select look.


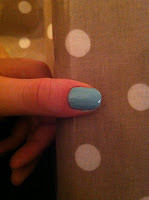
Of course, to match my aztec skirt...aztec nails.


A quick NOTD now, seeing as here in Wales it is St. David's day I thought I'd get patriotic! They aren't great as I was rather tired doing them but they were super simple. I just painted white and red bases and and used a green nail art pen.


Valentine's Day Nail Tutorial 
By TheTrendyChick

Hey guys! I am so happy to be collabing with Elinor to bring you this cute tutorial! I am going to be posting her Valentine's Day post on my blog as well, so hop over and take a look! I blog at http://thetrendychick.blogspot.com mainly about fashion, but I also include in recipes, diy's, and nail tutorials like the one I am going to show you today. 

Today's tutorial was inspired by the Crayon Art pictures that I am sure you have all seen! You know, the ones where you melt crayons with a hairdryer and let it run down the board? I have always thought that was such a cute idea, so I incorporated it into a nail tutorial! Here is a step by step tutorial on how to create it: 


As you can see, it is a really easy look at long as you do have some smaller brushed nail polishes. I prefer the Kiss brand which I normally buy at Walgreens, but any brand will do! You might also be able to use a toothpick or nail dotting tool to do the stripes instead. On a different note, please ignore the atrocious lighting in the one picture... I didn't notice just how bad it was until now!
I love how you can switch the colors too, but I just chose to do purple, red, and pink because of Valentine's Day! And I added sparkles on top because who doesn't love a little glitter, especially for V-Day! 

Let me know if liked this tutorial in the comments and don't forget to checkout Elinor's post

xo, Scarlett
As you may have seen on my twitter  yesterday I tried tartan nails! I though it was a perfect winter look so here is my tutorial.  Enjoy!

You will need:
  • 4 nail varnishes (I used light blue, dark blue, white and red)
  • Top coat
  • A cocktail stick/nail art pen
Step 1:  Paint a layer or two of your base colour onto the whole of your nail.


Step 2.Paint a strip of white across the lower third of your nail, if you are using a thin nail varnish then apply two coats.  I have seen this done before with acrylic paint as it is thicker, but it can be hard to find.

Step 3. Paint a darker blue strip across the top, middle and bottom of the white strip using either a cocktail stick or nail art pen.


Step 4.  Paint with again, the blue two lines using a cocktail stick or nail art pen vertically on the left side of your nail.


Step 5. Using the red to contrast, paint a horizontal line in the top third of your nail, crossing over a vertical line.   


Step 6.  Repeat and enjoy!


Thank you! And let me know how it goes if you try it.

Ellie x

.....Nail art pens! Definitely a key item for fashionistas.  If you nails don't match your outfit already then they should! Here's my favourite pens and patterns.


Firstly, the pens I use.  Nail Art - Mini Pens (5 pk) are excellent, quite pricey but very reliable!  I know a lot of people who complain about blockages (easy to sort out with a needle, however) but theses have served me well!  The colours are great, and similar packs are available in glitter, reds, blues etc.  What patterns can you do with these?  The colours are perfect to produce aztec patterns, and they're so easy once you get the hang of it!

If you want to do manicures then this Sally Hansen nail art pen is great, just like a felt tip pen you can draw on to your nails, and the white is so versatile it can be used with anything.  There are also black and silver pens as part of this range, black could be used in a really simple dalmation or zebra print whereas silver is super for a night look for any rock chick.

And finally, how great are these?! At £2.29 with outstanding reviews I simply couldn't leave them out, they look so good!  Although they don't come with nail varnish inside, so you have do dip them into vanish that you already own, but surely that isn't a problem.  I think these are great!

Hopefully everyone will get nail arting into the winter now!

Thank you!
Ellie x